Today, I’ve bring a session in Vista Launch in JHCC senayan. It talks about Building Enterprise Content Management solution.
You probrably already know that in WSS 3.0 we can use master pages to create branding to our site. Moreover, in MOSS 2007, we have content query web part which is very powerfull tool to play with.
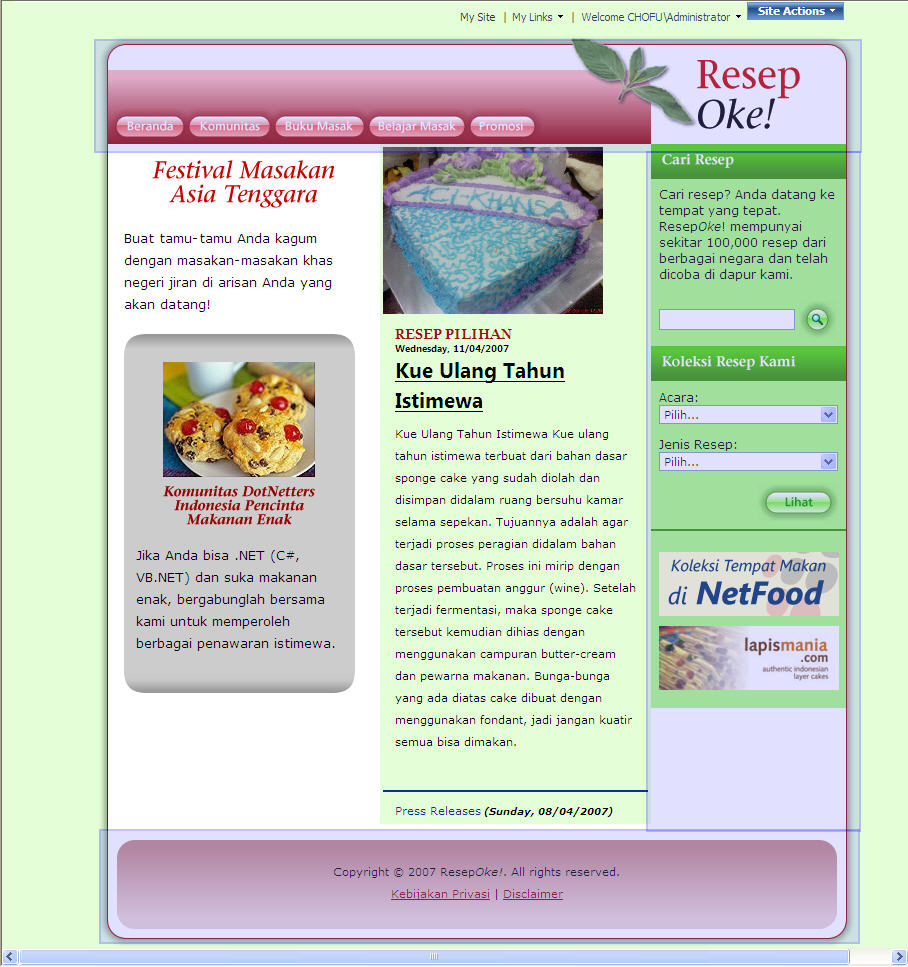
For example, we are going to brand our site to looks like the picture below. ResepOke.Com a fictitious receipts and foods review site want to publish their content using MOSS 2007 publishing template.

We change the navigation into button, and use content query web part to display page content into frontpage. We also list last 15 entries in the frontpage.
Step-by-step
1. Create new publishing site using publishing template and apply blackband.master, because it close to our design.

2. Create static HTML page, with style and slicing design. Copy paste the HTML code into blackband.master. We need to extract which part should be in master page. (See blue box).
3. From the new master page, create new page layout for welcome page and page layout for content page. In this case you only need to right click blackband.master in Sharepoint Designer and select “Create new page from master”.
4. In the new page layout page, we must define the content part for the page. For welcome page, I create two column table with single row. In each column, I put webpart zone (See red and white box). For content page, I create single column table and a webpart zone in that column.

5. Change page layout for ~/pages/default.aspx to the new welcome page layout. And also change page layout for document to the new content page layout.
6. Drop Content Query Web part into ~/pages/default.aspx and export into a .webpart file. Open the file using text editor and find “CommonViewFields” property change into
<property name=”CommonViewFields” type=”string”>ExternalUrl,URL;PublishingPageImage,Image;PublishingPageContent,Note;</property>
7. Import back the modified webpart into default page and delete the first one.
8. Using Sharepoint Designer, find StyleSheets library and open ContentQueryMain.xsl. Goto line 152, and find
<xsl:otherwise>
<xsl:apply-templates select=”.” mode=”itemstyle” />
</xsl:otherwise>
change into
<xsl:otherwise>
<xsl:apply-templates select=”.” mode=”itemstyle”>
<xsl:with-param name=”CurPos” select=”$CurPosition” />
</xsl:apply-templates>
</xsl:otherwise>
9. In the same library, open ItemStyle.xsl and add new stye template for item formatting.
10. Modify Content Query Webpart property and apply the new style item.
Yeah, all has been done without single line of compiling / coding, only need a bunch of XSLT.
Riwut Libinuko, experienced Architect. Currently working with Credit Agricole CIB, responsible for SharePoint platform in Asia Pasific. . Certification: SharePoint 2013, SharePoint 2010, SharePoint 2007, ITiL v3

Hi this is a great post for me, thanks !
Would you please tell me about how to design a page layout in querying content from different variation publishing page ?
Also, can i allow end user to input all the languages content within a single page layout ?
Thanks in advance !!
Hi,
This is really good. Can you post some idea about for creating template for the publishing page?
You guys have a very nice site. Thanks so much for the helpful blog.